
If you enjoy folding origami models that are both attractive and functional, you'll love learning how to fold these origami pockets. Pretty paper pockets can be used in a variety of different ways, which makes them a wonderful addition to your folding repertoire.
How to Fold a Simple Paper Pocket
This simple origami pocket makes an excellent embellishment for handmade cards, art journals, and scrapbook pages. This project is easy to fold even if you have no previous origami experience. The design is based on the traditional origami cup, which is a common first project in origami classes for children.
To make your pocket you'll need one sheet of square paper. Larger paper makes more versatile pockets, so you may want to use 12" x 12" patterned scrapbook paper if you have a large item to hold. Both sides of the paper will show in the finished pocket, so double sided paper with coordinating designs on each side is a great choice. If you don't have any double sided paper handy, try making your own using free printable origami paper designs.
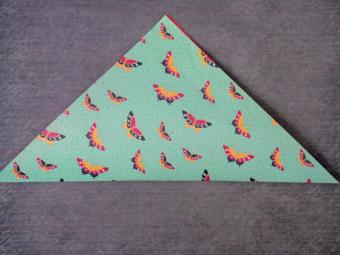
1. Begin by placing your paper in front of you in a diamond shape with the reverse side of the paper facing up. Fold the bottom of the paper up to meet the top corner so you have a large triangle shape.
2. Fold the top of the triangle down to touch the bottom horizontal edge. Crease well.

3. Make the side flaps of your pocket by folding the bottom corners of your triangle up to meet the top edge of the center triangle flap created in the previous step. Crease well.

4. Unfold the side flaps from the previous step. Pull the center triangular flap from the first step to the front, then refold the side flaps.
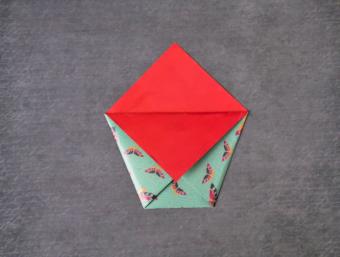
Your origami pocket is now complete, although you could choose to fold the back flap down if you want to create a slightly different look for the model. You may also choose to customize your paper pocket by trimming the back flap with decorative scissors or using small paper punches to create a design in this area.
Glue or tape your pocket to a card, journal, or scrapbook page, then tuck the desired item inside. To avoid tearing you should only use your pocket to store lightweight items. However, to make your pocket slightly sturdier, you can try folding this design from a sheet of cardstock cut into a square shape.

Paper Heart With a Pocket
This paper heart design from Idunn Goddess features a pocket on the front that can be used to hold small items such as jewelry. It is a lovely choice for creative gift wrapping or to use as a party favor for a Valentine's Day celebration.
Origami Tato
An origami tato is a type of pouch or pocket that is used to store small items like paper clips, wrapped candies, or tiny earrings. A tato requires more folding skill than a basic origami pocket, but the unique design is sure to impress your friends. This video from Paper Kawaii explains how to fold a tato in the shape of a pumpkin, which would be perfect for use as a Halloween decoration.
Practice Makes Perfect
As with any type of origami folding, do not be discouraged if it takes you a few tries to learn how to fold a paper pocket. With a bit of practice, you'll be folding perfect pockets for a variety of crafting projects.


